Middle Palisade via South Fork Big Pine Creek in Inyo National Forest, CA

Hike Middle Palisade via South Fork Big Pine Creek Inyo National Forest, CA

Class 3 14.3 miles 6800 gain 10-14 hrs Out + Back Jul 27, 2025
Effort
Beauty
Personality
Solitude

Middle Palisade via South Fork Big Pine Creek GPX Track

I need to offset my substantial website costs somehow! You can download a hike/drive GPX to assist you here. Before sharing my GPX tracks with others, please remember my site is otherwise a free resource.

Middle Palisade is a prominent 14er in California’s Sierra Nevada, part of the rugged Palisades subrange. It’s best known for its standard route, which involves a sustained Class 3 crawl up the northeast face. The approach to Middle Palisade requires route-finding across talus fields, though much of the route follows the Big Pine Creek Trail and subsequent social trails.

We started at the Big Pine Creek Trailhead, and after an initial walk along an old dirt road, the trail eased us into the day with desert scrub and hot sun. I might be a bad influence on my friends since my lazy ass prefers late starts and somehow I’ve managed to get everyone on board with the idea.

Soon we entered the John Muir Wilderness. The trail wound up switchbacks, brush giving way to granite. Above Willow Lake the trail briefly flattened, and looming ahead we could see Middle Palisade. Knowing how much vertical gain still remained made the mountain’s visible closeness almost comical.

We dropped into a green basin that looked idyllic until we felt mosquitoes biting us. The trail pitched upward again toward Brainerd Lake, a destination that marked the end of the official trail. Finding the social trail toward Finger Lake above took a moment, but eventually we located it as it led up a steep rise through a boulder field and reached the turquoise waters of Finger Lake with Middle Palisade above.

We wrapped around Finger Lake and gained a broad moraine. Cairns helped up the boulder-strewn ascent, but mostly we just kept to the crest of the moraine. Looking back, we could trace our entire route all the way to the trailhead, which made the effort feel strangely minimized and a bit disheartening. We reached a viewpoint up toward Middle Palisade, an indicator that it was almost time to leave the humped moraine and traverse to Middle Palisade Glacier.

The glacier was in a sad state, but that also meant more rock and less snow travel, so we moved quickly to the mountain’s base. From afar it looked like a sheer wall with no climbable line, and only once we were right up against it did the route reveal itself. It begins from a point off the perimeter of the glacier and up a ramp of loose boulders. This ramp led to the base of a red chute. We plopped on our helmets and approached the sketchy-looking feature. I crawled upward cautiously, haunted by too many desert choss piles, testing every hold. Surprisingly, I had no issue whatsoever on the way back down later. The looseness and exposure had me claiming this section Class 3+. I clawed my way up into the sunlit granite above.

Now the real fun began. Above the red chute stretched one of the longest, most delightful Class 3 scrambles I’ve ever done, characterized by hundreds of feet of wonderful Sierra granite, all positive holds and endless options. We zig-zagged, choosing our own lines, regrouping every few moves. It’s probably safe to say that when in doubt, keep left. The exposure never disappeared, but the flow and joy of the movement made it easy to forget the nerves.

Near the top, the route funneled into a narrow chute. Instead of taking the sketchy direct line, we scrambled left onto a broken face and gained the base of the summit block. A direct move up the block goes at Class 5, but a friendlier option wraps around from the south. From the summit, the jagged Palisade Crest rose before us and the Sierra stretched endlessly in every direction.

PEAKS ON HIKE
Elevation (ft) / Prominence (ft)
Peaks on hike
Elevation
Prominence
1
Middle Palisade
14037 ft
1158 rise

Hire me or show me some love!

Hire/refer me as a web developer or send me a few bucks if you find my site useful. I'm not sponsored, so all fees are out-of-pocket and my time preparing trip reports is unpaid. I really appreciate it!

Starting from the Big Pine Creek Trailhead.
Crossing a bridge along the South Fork Big Pine Creek Trail.
Lower elevation nearly-desert terrain.
A crossing of South Fork Big Pine Creek.
Entering John Muir Wilderness as the trail begins to ascend more earnestly before starting switchbacks leading to the center of this photo.
Switchbacks out of the brushy desert and into the granite.
Image 6 from gallery
Above the switchbacks, a flatter section above Willow Lake (out of view) led us to a viewpoint of Middle Palisade and the peaks of the Palisade Crest.
Dropping down into a green basin.
Pretty forest with lots of mosquitoes.
Ascending out of the green basin and up another more significantly slope as we continue toward Brainerd Lake.
Approaching Brainerd Lake.
Brainerd Lake, where the trail ends.
We wrapped around the west side of Brainerd Lake. The social trail we followed up to Finger Lake took some work to locate at first.
View back down toward Brainerd Lake as we continue up a steep social trail. On the top left you can see Willow Lake and the flatter section we'd hiked along earlier.
We reached Finger Lake. Middle Palisade seen above on the top right.
Wrapping around the north side of Finger Lake on a social trail.
Boulder field above Finger Lake (seen on the right). Cairns assist, but the goal was just to gain a broad moraine above the lake.
On the moraine view back down. We found it easiest to stay as high on the broad lump as we could.
Middle Palisade becomes visible ahead, center.
View back down, an unnamed little body on water seen on the left. In the distant center is the drainage housing Willow Lake and the Big Pine Creek Trail.
Middle Palisade seen ahead. We left the moraine's apex once it introduced really large boulders and instead traversed around it to reach the Middle Palisade Glacier.
Close-up toward the Middle Palisade Glacier and Middle Palisade. Note the red chute in the center. We would approach that from the ramp on the left and then ascend directly up it. The unlikely-looking route then ascends directly up the face.
View back toward the traverse from the moraine.
We traversed the boulder field at the base of the Middle Palisade Glacier.
A short spurt along the glacier.
Ascending the ramp at the base of the red chute.
View back at our progress, the boulder field steepening as we ascend the ramp.
Class 2 ramp up loose boulders. Red gash seen on the right. A trickier ascent option is possible by going directly up (center).
Approaching the red chute.
A shot I took later in the day on the way back. You can see Woody in the center and Chris at the top of the red chute.
Close-up of the red chute.
View back down as we start up the red chute, Class 3+. It's loose, but the moves are easy enough. The exposure made me want to call it Class 4, but my friends convinced me that would be misleading, and on the way down it felt a lot easier somehow, whereas the ascent definitely spooked me.
Class 3 ascending.
Class 3 ascending.
View back down, about halfway up.
Upper portion of the red chute.
From the top of the red chute, view down.
The rest of the route was much more solid, but the initial red chute had me a little concerned. Don't mistake "more solid" for "more safe". It's a very exposed Class 3 scramble with very little margin for error the whole way up.
View back toward the top of the red chute as we start up an initial diagonal crack, Class 2.
At the top of the diagonal crack, view back. The Big Pine Creek Trail came up from far top left.
The Class 3 fun begins! There are various options to ascend the high-angle granitic slope, and we found ourselves choosing slightly different lines the whole way up, micro-route-finding our way up over 1000 feet of Class 3 scrambling. It was wildly fun and felt like an impossibly unlikely route that kept Class 3 somehow.
A side-shot of the scramble for perspective on steepness.
View back down, Finger Lake seen center below the moraine we'd hiked up.
So much more scrambling to go!
Delightful scrambling.
This was our perspective for much of the way up: lots of large holds to choose from, with little zig-zagging route choices.
Chris navigating above me.
View back down. Note the prominent tower in the center. Make sure to keep it as a landmark on the descent, and head down to the left of it on the way back.
Continuing up, keeping left whenever unsure where to go.
Quite steep.
Quite steep.
Another shot back down. Finger Lake seen center.
Close-up of the route so far.
Steeper ledges higher up as we approach the summit.
Chris seen left of center, camoflauged.
Nearing the summit crest, the route gets narrow into a chute.
Just after the narrow chute, we left the more natural direct progression and continued left. Continuing all the way up the chute resulted in a much more sketchy route to the summit.
Heading left out of the chute to gain the summit.
View back toward the chute.
Chris and Matt seen pulling a Class 5 move to access the summit block directly. This is avoidable by staying about 30 feet below and wrapping beneath the summit block on a wide ledge, then gaining the summit from the south instead of the north.
Middle Palisade summit, view west toward Normal Clyde Peak.
Close-up west along the Palisade Crest.
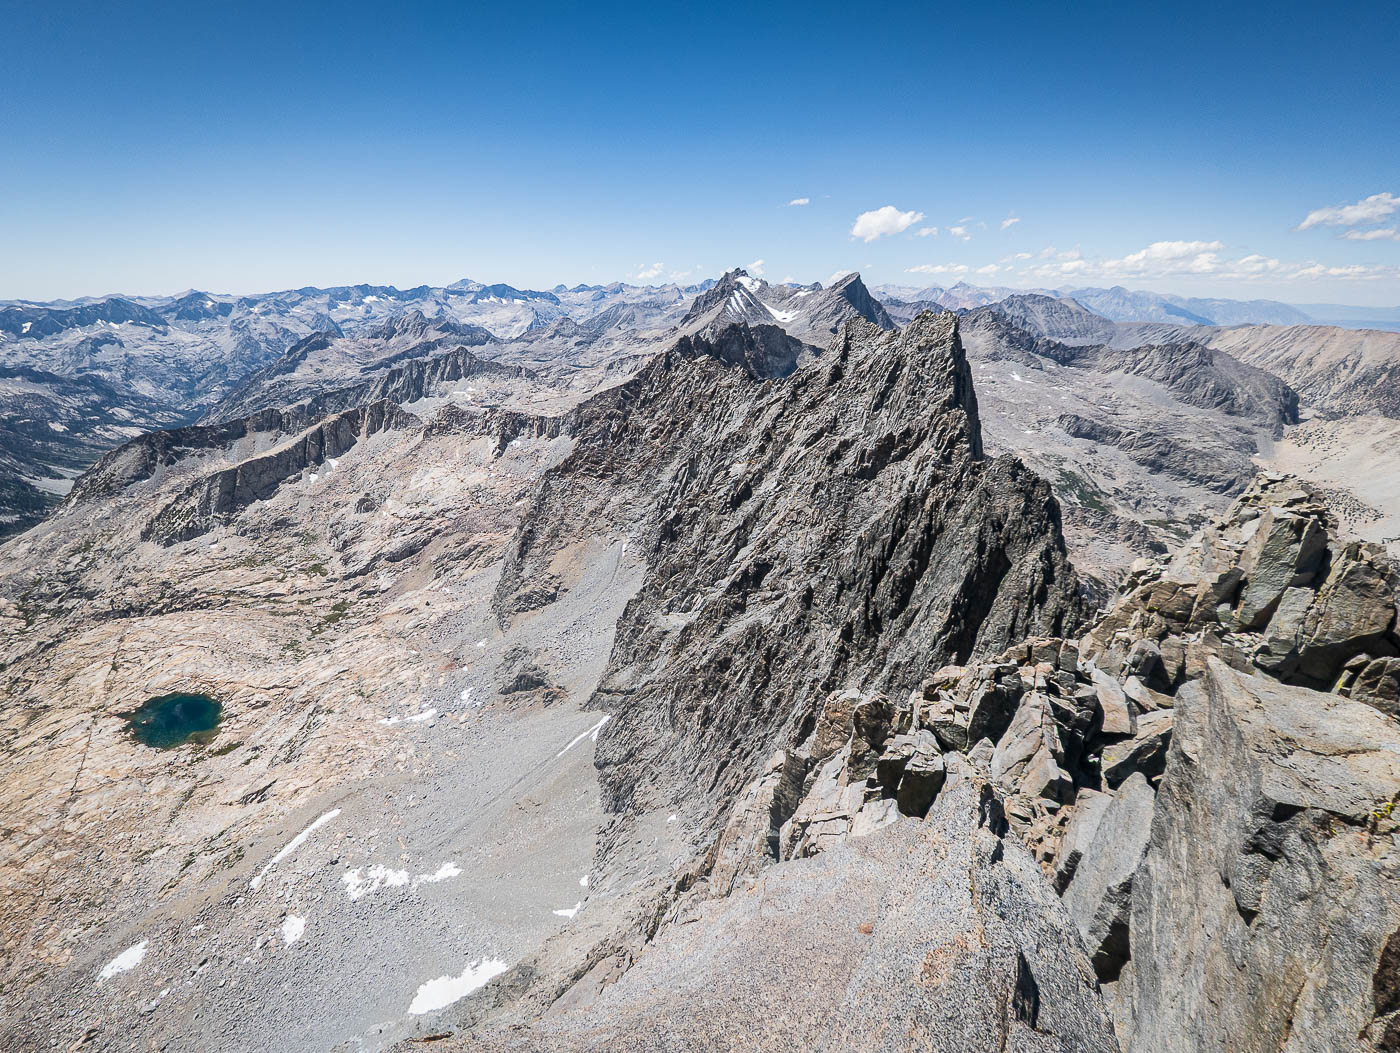
Middle Palisade summit, view south.
Middle Palisade summit, view east.
On our way back, a view at the gorgeous granite as we near the trailhead.

Hire me or show me some love!

Hire/refer me as a web developer or send me a few bucks if you find my site useful. I’m not sponsored, so all fees are out-of-pocket and my time preparing trip reports is unpaid. I really appreciate it!